دانلود آموزش وی ری Vray با دوبله فارسی تری دی مکس پلاگین maya autocad 3d max revit After Effects sketchup معماری ArchiCAD مدل سه بعدی Lumion آبجکت صحنه آماده به رندر فیلم تکسچر و متریال آماده انیمیشن سازی رندرینگ مدلسازی 3 بعدی بازی سازی marvelous designer Photoshop InDesign illustrator Solidworks
Friday, December 27, 2019
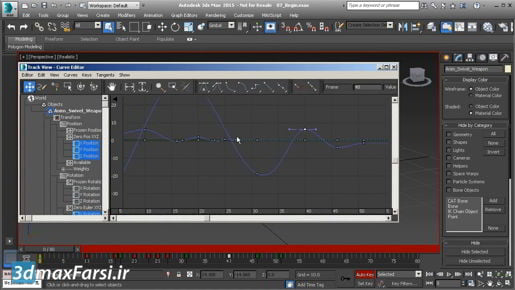
3ds Max Animation Navigating the updated Curve Editor

3ds max Getting Started Using project folders

3ds max Getting Started Using project folders And with my project now set to the exercise files, if I go to the file menu and choose open, I should be taken to my current project scenes folder and that is in fact what has happened. And here are all the scenes for the course, alright. I'll cancel out of that, alright. So I've set up my projects. If I want to switch to a recent project, all I have to do is choose it from the pull-down list here. So I can for example switch over to the 3ds Max essential training project. One last thing to mention, if you open a scene file that's in a different project than the current one, then 3ds Max will ask you if you want to switch projects or not. Let's say that I have my project currently set to 3ds Max essential training, but then I try to open a file from a different project, I'll do that. Go to the file menu, and choose open, and then navigate to a completely different project. Desktop, exercise files, scenes, and I'll open the file 0104project.max, click open and I get a dialogue warning me about a project mismatch. Here I can choose whether or not I want to change the current project to match that of the incoming file. Usually you do want to do this. You want to change the project so that the incoming scene file can find all of its dependent assets, such as texture files. If you choose don't ask again, then 3ds Max will automatically switch projects for you until the next session, that is until the next time you launch the program. I'm going to leave that switch off, so that I will always be notified of any future mismatch. Click continue, and the file is loaded, it's just got one sphere in it, and the project has been switched over now to the exercise files. Alright that's how to create, set and switch project folders. And that concludes our chapter on getting started.
3ds max Getting Started Setting preferences

3ds max Getting Started Setting preferences Moving on to the files tab. Kind of importantly, I think it's a good idea to enable this switch that says convert local file paths to relative. I'll turn that on, and now anywhere that a file path is displayed in 3DS Max, it will be displayed to me relative to the location of my current project. It's going to store an absolute path for every asset. In other words, it's going to know what drive letter the asset is located on. But for the purposes of self contained projects, we want all of the internal links to be relative to the project route. We don't actually want to store the project's drive letter or volume name or its network location. And the reason for that is that so that our projects can be portable. And that means we can pick up an entire project and move it somewhere else, and all of the links internal to that project will still be preserved. And that's what this switch accomplishes for us. Technically it is storing the absolute path and merely displaying the relative path to the user. but from a practical standpoint, if this switch is off, then we could potentially run into some issues with our file paths getting mangled. So I do recommend that you leave that on. So moving on, we've got the view ports tab, and in here this is also very important. This is where we can choose and configure the display driver. And in 3DS Max, the sort of software module that draws images in the view ports here, that's the display driver and it goes by the name Nitrous. And we currently have Nitrous at the Direct3D level 11 feature set. And that's a good setting, and we do want to leave it at that. However, if you're having some issues on your computer, if 3DS Max is flickering or doing strange things, first you should look at updating your display driver, whether it's an Nvidia or AMD. You'll want to find the appropriate software and try to update that driver. And if that doesn't work you can go in here and choose a different driver. Click on choose driver. And from this pull down list we can actually downgrade the driver to an older, possibly dumber display driver. For example, if you are doing a remote session, maybe you're logged on through remote desktop, you might need to choose a software renderer instead of these hardware renderers. But again, you want to use the highest level Direct3D you can whenever possible. So leave that as it is. And even though I didn't change anything, I got a warning saying that the driver changes will take effect the next time you start 3DS Max
3ds max Getting Started Customizing user interface and defaults

3ds max Getting Started Customizing user interface and defaults And almost never use the 3ds Max standard material. And finally with this Max.ART preset, objects will not inherit the properties of their enclosing layer. And so for example we can set the display properties of objects individually even if they're inside the same layer. So I'll click Set. And we got a little warning saying that the settings will take effect the next time we restart, and that's fine. And then you can see you may get some screen corruption because it just reloaded the interface, but that's okay just close the program and relaunch it. And that's how to choose the default tools settings in the customize user interface and defaults window.
3ds max Getting Started Choosing a workspace

3ds max Getting Started Choosing a workspace But once it does you'll see that we have a different toolbar up here at the top. And some of the tools have been moved down here to a another toolbar on the side. And we have a different set of menus. And the alt menus are actually more complete than the standard or default menus. If you are familiar with other Autodesk applications such as Revit, you might want to choose the so called design standard workspace. Let's choose that from the workspace's pull-down. Design standard. And once that refreshes we'll see that we have larger buttons up here, and a series of tabs. And again this is designed to resemble some of the other Autodesk applications. There are a number of these workspaces from which you can choose for example: There is a modular mini workspace.
3ds Max 2020 New Features Conclusion

3ds Max 2020 New Features Conclusion I've only stored those scenes once inside Xrefs. Additionally, other dependent files are found in scene assets. Open that up. Inside scene assets images are a few bitmaps that are applied to materials. There's also a single vector art file of a logo. There's similar vector art files. Over here there's one, there's an Illustrator document, because later I'm going to illustrate how to import from Illustrator.
3ds Max Rendering A360 cloud rendering

3ds Max Rendering A360 cloud rendering The sun here is coming from directly overhead. That's certainly an issue, we would probably have better results if we used photometric lighting, rather than the sun in the sky, but let's take one last look at what we can do with what we have, and that's adjust the exposure. Back up here in the thumbnail, click on that down facing arrow, and click adjust exposure. And then, once our preview is loaded we can play around with the exposure of this shot after it's been rendered. And I can for example, pump up the highlights. Give it a little bit more saturation, and change the white point which is the color balance, or white balance. Make it a little bit warmer. If we're happy with that exposure, then we'll click apply down here. And then we'll need to scroll back up. We may need to wait for that to calculate, but when once it's finished, we can now download the image. Once again click on the down arrow and choose download image. Let's save it in our current project in the render output folder. I'll right-click to make a new folder, and give it a name 05_05_A360_cloud_render Hit enter, and double click to enter that folder, and click save to save the file out. Now we've got to local copy of that file, we can open it up here in the Windows Explorer interface. I can double click on that file, and open it in the default viewer, and here it is the A360 rendering. I'll just maximize that and that is a draft quality rendering really not a standard quality but it calculated in the cloud we didn't have to use any of our local computing resources. There are some limitations, but depending upon what you're doing it may save you some time and effort to render in the cloud. And that concludes our chapter on rendering, and it also finishes our whole course on 3DS Max 2017 new features.
Subscribe to:
Posts (Atom)