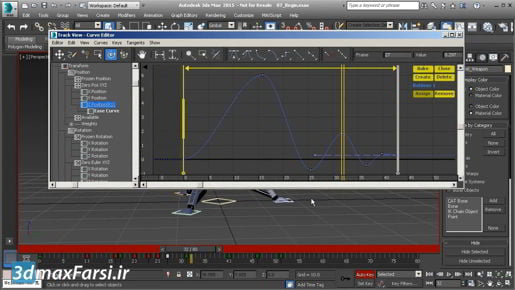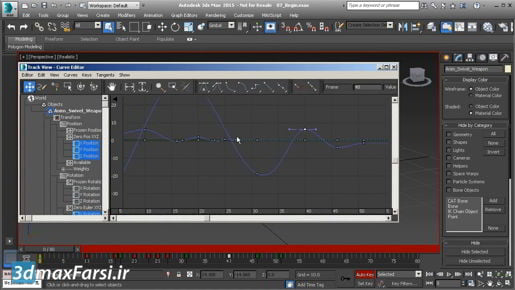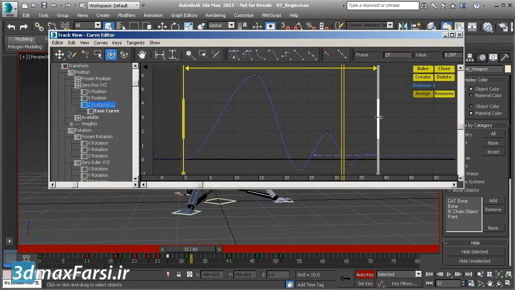
3ds Max Animation Navigating the updated Curve Editor If we select some keys, you'll see the length of those tangents there. And you can click this button to make the tangents larger. Just keep clicking it repeatedly and you will make those tangents larger and larger. Likewise, there's a button to make them smaller. The bulk of the new tools are on this tool bar here which is called the Keys Only Tools tool bar. We'll look at that in another movie but there are a bunch of miscellaneous key manipulation tools here. There are a few other tool bars available that are hidden by default. Let's look at how to reveal them. Right-click on the textured bar on the left of any one of the tool bars. Hold down the right mouse button and choose show toolbars. And these include all of the old ones that used to exist as well as some new ones. For example, we can choose the curves tool bar and that's got some useful buttons on here. For example, view all tangents. And when that's on, you don't have to select anything in order to see the tangents. Go back to my move keys tool now that I'm done scaling here. Or likewise, as we saw in the dope sheet, we have the ability to display key-able icons whether a track is key-able or not. And that's found on the curves tool bar as well. But the commands on the curves tool bar are also available from the menus. For example, we can go up to the view menu and enable keyable icons. Or once again, disable it.