دانلود آموزش وی ری Vray با دوبله فارسی تری دی مکس پلاگین maya autocad 3d max revit After Effects sketchup معماری ArchiCAD مدل سه بعدی Lumion آبجکت صحنه آماده به رندر فیلم تکسچر و متریال آماده انیمیشن سازی رندرینگ مدلسازی 3 بعدی بازی سازی marvelous designer Photoshop InDesign illustrator Solidworks
Thursday, December 26, 2019
Managing sample slots 3ds max Materials
I'll chose instance in this case. And now I've got that material stored in my scene. Even though it's not assigned to an object. And I can even delete it from the view here. Select it and press Delete. And if I ever need to get that back, I can drag it from the sample slot onto the view, and either instance it or copy it. Sample slots are very useful for storing materials that are not assigned to any objects in the scene, but because there are only 24 of them, you may run out of them pretty quickly. In the following movie, we'll see how to create material libraries to get around that limitation.
3ds max Managing scene materials
3ds max Managing scene materials . I'm just removing them from this view. So likewise, I can select the file cabinet node and press Delete on the keyboard. If I need to get any of those back, I can just drag them from the Scene Materials over into the view, and I get a prompt asking if I want to make an instance or a copy. If it's an instance, once again, it will be connected to the objects in the scene to which that material is assigned. If it's a copy, there will be no connection. We'll choose Instance, click OK, and then double-click on that node. We can go back to editing it live, change that color back. The key concept here is that there is not really a hard relationship between the nodes in the graph versus the scene materials. So for example, I can drag out another leather here and make it a copy, and click OK. And it's got a new name, and I can change its parameters, but since it's not assigned to anything, nothing changes in the view. If I delete this node and it's not assigned to anything in the scene, then I won't be able to get those parameters back. That's how to work with scene materials.
Using the Slate Material Editor - 3ds max Materials
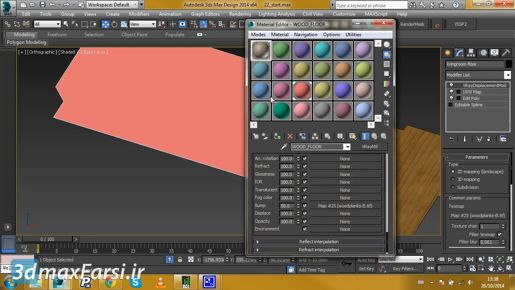
Using the Slate Material Editor - 3ds max Materials, so now I've set up my Arnold processing options, I can close the Render Setup dialog and open up the Material Editor from its button on the main toolbar or press the keyboard shortcut which is M. The Slate Material Editor has an older cousin which is called a Compact Material Editor and I don't recommend that because you can't see a graph of the network. But it's here in the Modes menu if you want to switch back to the old-school Material Editor. I'm going to stick with the Slate Material Editor for this course. Slate is made out of four windows. The main windows includes the title bar, the menu bar, the toolbar and one or more of these view panels which show graphs of the shading networks
.
Using the Slate Material Editor - 3ds max Materials On the left is the material Map Browser. That's another panel separate from the main Slate window. In fact, I can click and drag and drop that off and make it float separately if I want. I can dock it back to Slate by dragging it over there and then dropping it onto one of these arrows. Put it back over there on the left. On the right, we have two windows, the Navigator which just shows us an overview of where we are and the graph, so the View panel here is represented by the red line in the Navigator and if I navigate around with the middle mouse button, we can see how that window is changing or I can zoom out with the mouse wheel or zoom back in. I can set the zoom amount down here to exactly 100%. I don't ever use the Navigator, so I'm going to hide it. Just click the little X button and it goes away. If you want to get it back, you can find it in the Tools menu here. Double click on a node in the view or graph to load its parameters into the Parameter Editor. To assign a material to objects, you can simply drag from the material output node onto an object. Let's make a new material and we'll see how that works. I'll drag a material out from the Material Map Browser under Materials,
3ds max Keyframe Animation Setting up Time Configuration
3ds max Time Configuration
Keyframe Animation Setting up And now with the end time of 5 seconds and 0 frames we have a duration of exactly five seconds. Or I could use SMPTE conventions and start on frame 0. Set the Start Time to 0 and set the End Time to 429. And now we're back at a duration of exactly five seconds. All right, so that's if you want to use SMPTE or time code. If you want to use just ordinary frames, of course, you can do that. You can go back to Frames in the Time Display, and now my last frame, or the End Time is frame 149, but I have a total of 150 frames of animation. All right, that's the time configuration dialog. I'll click OK to close that. If we want to change the length of the track bar timeline without drilling into that Time Configuration dialog. There are some keyboard and mouse shortcuts for that. To change the start time hold down control and alt and drag with the left mouse button. And if I drag over to the right notice that we can actually go into negative numbers on the track bar. And that can come in handy in some situations. For example, we might want a character to assume a neutral start pose, also known as a skin pose. A common practice for that is to use frame 0 for the skin pose and begin the actual animation on frame 1. But if you're using time code conventions you'll want the animation to start on frame 0. In that case you can use frame -1 for the skin pose and start the animation on frame 0. All right, I'll set that back to starting on frame 0. Control alt and left mouse button. To change the End Time for the track bar, hold down control and alt and drag with the right mouse button, changing the end time. To shift the entire time range, keeping the same animation duration, but moving the start and end times by the same amount, hold down control and alt and drag with the middle mouse button. All right, just to make sure that I get everything back the way I want it, I'll go back into Time Configuration. I'll set my Start Time to frame 0 and my End Time to frame 149. And that's a pretty comprehensive overview of how Time Configuration works.
3ds max Keyframe Animation Setting up Time Configuration

3ds max Keyframe Animation Setting up Time Configuration This is the least ambiguous option here because PAL runs at precisely 25 frames per second. If we choose Film over here then 3ds Max will adopt a frame rate of 24 FPS, but that's completely USA centric because historically the frame rate for analog celluloid film in Europe has been 25 FPS. So the term Film here is also kind of misleading, and if we choose any of those three options, the interface doesn't tell us what the actual frame rate is. No matter which of those three options we choose, this FPS field here won't change. That field only becomes active when we choose the Custom option. And that's exactly what I recommend. If you want to know for certain what your frame rate is with no ambiguity, just choose custom and plug in the frame rate you need. Now the cool thing about 3ds Max and most 3D programs is that you can change the frame rate without changing the time duration of the animation. If I want to go for a European standard, I would put in 25 frames per second, type in 25 and then when I press enter watch what happens in the track bar down here. I'll press enter and now we have a different readout in terms of the number of frames. It went from being 100 frames down to 83 frames. What happened was that 3ds Max re-sampled that segment of time at 25 frames per second instead of 30. I'm going to set that back up to 30 now. And now we're back at 100 frames. The mechanism that allows for this is that 3ds Max subdivides time into tiny elements known as ticks. There are 4,800 ticks in a second. That's the time base or the resolution of time internally.
Wednesday, December 25, 2019
3ds max Keyframe keyframes in Auto Key mode

3ds max Keyframe Animation Auto Key mode
3ds max Keyframe keyframes in Auto Key mode So I can maybe go to the middle of the animation here around frame 70 and turn Auto Key back on again and with that move tool active, change the position of the camera. Maybe move it back a little bit. Release the mouse and now I have another key frame at frame 70. Disable Auto Key and rewind and play it back again. So I've got a little bit of a subtle arc there where it's coming in closer at the end.
3ds max Keyframe keyframes in Auto Key mode Okay, that's how Auto Key works. It's pretty simple. You want to remember if Auto Key is on. You don't want to accidentally leave it on. That would be bad because then you might be working in some other aspect of your scene and creating key frames when you didn't intend to. It's a classic rookie mistake. 3ds max Keyframe keyframes in Auto Key mode You leave Auto Key on and then you go into the material editor and all of a sudden you're animating colors and you didn't even realize you were doing that. So when you're finished creating animation, always just reflexively remember to turn Auto Key off.
3ds max Keyframe Animation : Set Key mode Creating keyframes
3ds max Set Key mode Keyframe Animation
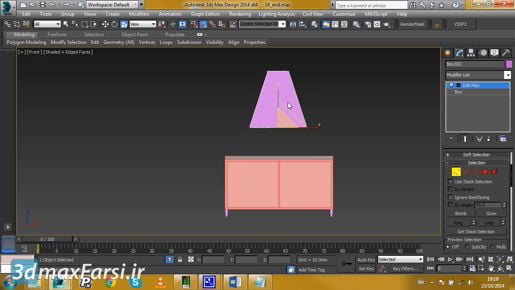
Creating keyframes in 3ds max tutorials But before going into set key mode, we want to determine what we're going to be keying. Because when we click the big key button here, certain transforms or parameters will be key framed depending upon what we choose in the filters. So we have filters here, big button, key filters. And we don't want to key frame anything except for rotation. So I'll turn everything else off. Close that dialogue, enable set key, and I'm parked at the first frame of the animation, frame zero.
Subscribe to:
Posts (Atom)


