Thursday, December 26, 2019

Choosing aspect ratio in Render Setup - 3ds max Camera Techniques


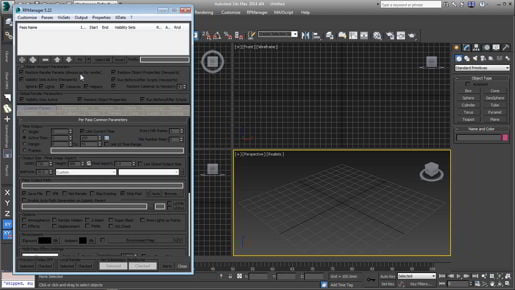
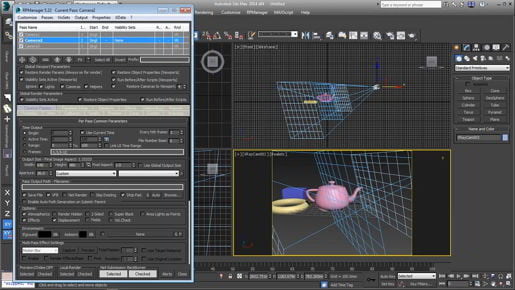
Choosing aspect ratio in Render Setup - 3ds max Camera Techniques Most formats nowadays don't use non-square pixels. But some standard definition formats still use non-square pixels and if for some reason you need to output directly to, for example, a D1 format, then you can change the pixel aspect ratio here. In fact, there's already a preset for that. And that's what this is, 720 x 486. Click on that and we get a pixel aspect of 0.9. But notice that the screen aspect did not change, 640 x 480 with a pixel aspect of one gives an image aspect of 1.333. If I set that to 0.9 and press enter now it's automatically changed the height. So the pixel aspect really matters here. We want it to be a value of one unless we're dealing with some antiquated format like D1. In which case, we could have a non-square pixel. But check on this. Make sure that you're not getting non-square pixels when you don't want to. I'm going to enter in some custom values for resolutions here.

Setting up a free camera - 3ds max Camera Techniques

Setting up a free camera - 3ds max Camera Techniques


Setting up a free camera - 3ds max Camera Techniques So I'll go back to the select object tool, select the physical camera, and we can load it into the viewport as well. Just bring that back. And in the modify panel, at the very top, is a switch for targeted. So I can just turn that off. And now that camera no longer has a target. And it can be rotated directly. So I can right-click in the top view to give focus in that view and rotate around the world z-axis in order to pan the camera left and right. And that's how to create a standard free camera or convert a physical camera to a free camera.

Enabling safe frames - 3ds max Camera Techniques

Enabling safe frames - 3ds max Camera Techniques

How To Use 'Visible To Camera' Technique


Enabling safe frames - 3ds max Camera Techniques So we are actually cutting off that corner, whereas we can see it quite clearly in our view port. Well what's going here, is the view port aspect ratio, or the ratio of width divided by height, is different from the renderer, and that's why we're getting this odd result. So I'm going to cancel my rendering. Just go up to this little floating window, select it and then click cancel, and we can close the rendered frame window as well, and enable safe frames in our camera view. We can enable safe frames from the view port label menu, click on the name of the camera, and then enable show safe frames. Now the view port is actually cropped to the aspect ratio of the rendering. 

3ds Max: Cinematography for Visualization

3ds max  2020 Camera Techniques And we have a what you see is what you get situation. So we know that this is the framing we will see, when we actually render. So I can change the framing, move the middle mouse button, and then do another test render to see what happens. Click on render production. Alright and now the framing is identical between the two views. And actually just by serendipity, just by luck, they're actually the same size on the screen here too. So it's very easy to see that there is a one-to-one correspondence in the framing. Alright we can go up to the rendering window here, click cancel, close the rendered frame window as well, and you'll need to turn safe frames on and off, really for each camera, and to speed up your work a little bit you can use the keyboard shortcut, which is Shift+F. Shift+F turns safe frames on or off. Alright and I can resize the command panel, bring that back down to one column. And now we see that the view port is wider than the rendering, so we have pillar boxing here, we have black bars on the left and right. But regardless of whether the view port is wider or taller than the rendering, you'll always see this yellow box indicating where the true edge of the frame is. If you want to see safe areas, you can do that too from the view port configuration. Click on the plus sign in the view port, go to configure view ports, safe frames, and in here we can enable an action safe rectangle, and click apply, and now we have an inner rectangle that indicates the action safe area. And the size of that is controlled here, so I can bring that action safe down to a value of five and click apply. And now we have a much larger action safe area, and smaller area that's not safe. 3ds Max: Cinematography for Visualization

Creating a physical camera and target - 3ds max Camera Techniques

Creating a physical camera and target - 3ds max Camera Techniques

3ds max 2020 physical camera and target

Creating a physical camera and target - 3ds max Camera Techniques Target, and Free Physical is, as I said before, the more modern camera and Target and Free are both flavors of the standard old-school camera. Let's create a physical camera click on Physical and then click and drag in the top viewport and release the mouse to determine the position of the target and then right-click to exit creation mode. As we can see in the left and front views, it's positioned right at the ground plane so let's move it up, we can select the camera or its target or actually we can select them both and the way to do that is to click on the line that joins the two, so get in closer with the wheel, de-select everything and there's a blue line here, it's kind of hard to see right now but it is there, tell you what, I'll select both the camera and its target with the selection rectangle and then select and move, bring that up so you can see the blue line there Creating a physical camera and target

Creating a physical camera and target  if I just click on that line, I'm actually selecting both the camera and its target. Let's load the camera into a viewport. I like to keep the perspective view available for sort of the God's eye point of view or the artist's point of view, and I'll also need to have a panel for the camera point of view. I'm going to need the top view 'cause that's my layout or plan view, I can sacrifice this left view over here and load the camera into that view. So from the viewport label menu, I can click on the name of the viewport which is currently Left, and then choose Cameras and then the name of the camera which is PhysCamera001 now we're looking through that camera's lens. Enable shading with F3, and we can experiment with moving the camera or its target Creating a physical camera and target

Sculpting with Conform Transform - 3ds max Freeform Modeling

Sculpting with Conform Transform - 3ds max Freeform Modeling


Sculpting with Conform Transform - 3ds max Freeform Modeling we increased the Conform amount to make the road stick to the landscape, but now for this application of the tool, we need to set the Conform amount to a value of exactly 0.1. And now we can do a screen-space adjustment, or a tweak, of this model. And I'll tilt down so I'm looking at this almost on edge, and turn off the edge faces with F4, and just click and drag to sculpt the landscape. And I'm doing this in screen-space, and I can tumble around. And we can prove that it's in screen-space, because if I look at this from the top and then drag, you see, I can actually distort that shape and push it in any arbitrary direction. Alright, I'll undo that. So we have the usual keyboard shortcuts for this. 

Sculpting with Conform Transform - 3ds max Freeform Modeling In order to adjust the full strength and fall-off radii, and the fall-off radius is CTRL + drag, and the full strength radius is SHIFT + CTRL + drag. Alright, so that is the Move Conform. We also have Rotate, Relax, and Scale. So if we choose Rotate Conform, we'll be able to see this better with edged faces. I'll hit F4 and go into some sort of screen-space mode here, looking at this on edge and click and drag to rotate, and I'm rotating those polygons around the cursor in screen-space. Alright, so that was a little bit of an issue, but we can fix that with the Relax brush. Alright, very cool.

Adjustment with Move Conform - 3ds max Freeform Modeling

Adjustment with Move Conform - 3ds max Freeform Modeling

3ds max Freeform Modeling

Adjustment with Move Conform - 3ds max Freeform Modeling To adjust the falloff radius it's Control + Drag. And when I have a very small distance between the inner and outer circles I'll have a really hard brush. Get in a little bit closer here. Or maybe get farther out, then click and drag. You can see we have a very hard effect. Alright so ill undo that with Control + Z. We'll make that falloff radius larger once again with the keyboard shortcut Control + Click and Drag.Adjustment with Move Conform - 3ds max Freeform Modeling   And I want to make the full strength radius very small, and the keyboard shortcut for that is Control + Shift and drag.


Conforming one object to another - 3ds max Freeform Modeling

Conforming one object to another - 3ds max Freeform Modeling

Video Tutorials 3ds max Freeform Modeling


Conforming one object to another - 3ds max Freeform Modeling And now all the Freeform tools are available. Now we can conform the selected object to another editable poly. On the Freeform tab, there is a button that is currently labeled "grid." That's the "draw on" button, and that gives us the ability to select an object that we want to draw on or conform to. And this is a pull-down list, so click on the little down arrow and choose "draw on surface." Next, we need to pick an object, and currently I have the word "terrain" listed here, but on your system it'll probably just say "pick," and you'll want to click on that button that says "pick," and then you can select the object in your view. And then it should actually display the name of the object. I just wasn't able to demonstrate that, it was sticky, it just remembered that sometime in the past, a million years ago, I clicked on that

Conforming one object to another - 3ds max Freeform Modeling  . I was unable to get rid of it, so there you have it, but on your system it will say "pick." And then you click the object. Okay now the next step is, we want to set some options before we actually start conforming. And first we have the off-set here, and that's a gap between the conforming and a conformed object. And we need that to prevent polygons from poking through the road. I'll give that a low value of point one and that should be enough. My system is currently set to meters, and this is a 1/100 scale model, that is 10 meters on a side. So I've set the offset value, and we're almost ready to do our conform.