Friday, December 27, 2019

3ds Max Materials and Mapping Applying vector text decals with TextMap

3ds Max Materials Mapping vector text decals with TextMap

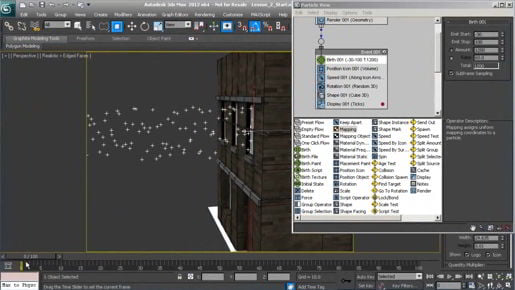
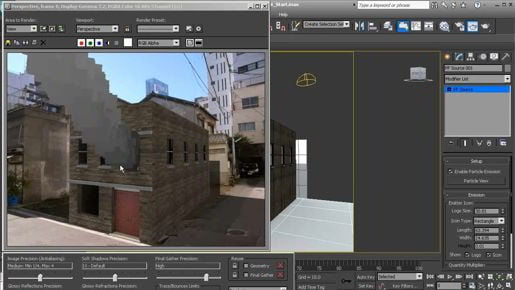
3ds Max Materials and Mapping Applying vector text decals with TextMap We can control the size of that text object through the usual way which is in the coordinates roll out, the tiling here. We can also change it based upon the size of the region of the TextPlus object itself and that's done here. So in the text parameters it says map boundary. It's defaulted to text bounds. If we select the TextPlus object, go into its modify panel and play around with the region here we can control the size of the text on the object. If I increase the length of the region we're causing it to become taller and it's squeezing the type into a smaller area. I'll reduce that length once again. Then we have the width. If I increase of the region we're causing the text to be squashed into a smaller area from left to right. Notice that it looks very fuzzy in the view port here. There's is a control in the parameters for text map called hardware bitmap size but this only affects renderings in Quicksilver and iRay. We could play around with the view port configuration and try to get that to look a little bit better here in the view but it really doesn't matter because all that we really care about is whether it renders well. We'll get in very close there and do a quick production render. Click on the teapot with the lightening bolt and in the production rendering we have extremely crisp outlines, very cool. Of course, we can change the fill and background colors here.
Choosing a 3ds max reference coordinate system


Reference Coordinate System 3ds Max 2020

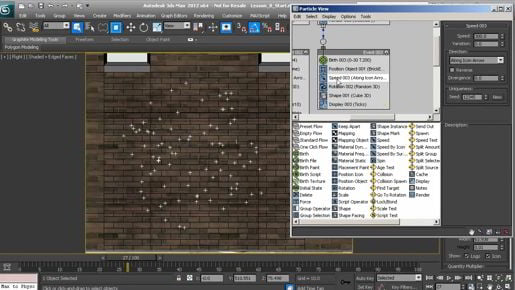
Choosing a 3ds max reference coordinate system So if I try to animate this moving in that direction, what I would find is I'm actually animating in world x and y because the object has no parent. So local mode is useful for modeling operations, but if you're going to be animating then you'll need to look a little bit deeper. And we'll talk about that more when we get to rigging and hierarchies. Let's move on now to the rotate tool. And it's got view and world coordinates as well. And it's got local coordinates. Local coordinates will be easier to see if we select a single object rather than this group or assembly. So I've got an object over here, this dodecahedron. It's a single object. And I can use my newly minted keyboard shortcut that I created in the previous movie to zoom in on that object in all views. And it's shift control z for zoom extents all selected down here.

3ds max hotkeys not working

3ds max 2018 keyboard shortcuts not working

3ds max hotkeys not working I'll go back to Zoom Extents All Selected, I chose it from the flyout, and again, that caused it to actually commit that command. Well, if I want to zoom all viewports to all geometry, I can just deselect, select nothing, and then use the Zoom Extents All Selected button and that does the same thing as Zoom Extents All. Zoom Extents All Selected is a better command because it's a two-in-one command. It'll allow me to zoom to a certain object or, if I have nothing selected, it'll allow me to zoom to all objects in all views. Let's customize that. Go into the Customize menu to Customize User Interface and in the Customize User Interface dialog, in the Keyboard tab, in which you'll see all of the commands for 3ds Max. And they are categorized here, so that might help you narrow the search a little bit. But, in all honesty, you need to know the name of the command in order to find it and if you don't know the exact name of the command, then you can hover your mouse over an icon and you should get a tooltip to tell you what that command is. Zoom Extents All Selected. So that'll be at the bottom in alphabetical order. Zoom Extents All Selected has a blank next to it, there is no shortcut. But, Zoom Extents All does have a shortcut, as we saw earlier, Zoom Extents All is redundant because Zoom Extents All Selected will perform that function as well. So I'll select Zoom Extents All Selected, and over here we have a hotkey field. Click in there to get focus to that field, and then hold down the keys that you want to assign.

Saving time with 3ds max keyboard shortcut hotkeys

Saving time with 3ds max keyboard shortcut hotkeys

Saving time with 3ds max keyboard shortcut hotkeys  Likewise, I can use the wheel to zoom in and out in the ortho views. Back to the Perspective View. Click there, maximize it with Alt+W. The other keyboard shortcut you need to memorize is Orbit. And that is Alt and middle mouse button. So if nothing is selected, and you hold down Alt and middle mouse, you will Orbit or Tumble around the origin of the world. If you select an object, like that dodecahedron object there, and then Alt and middle mouse, then you'll see we can Orbit or Tumble around that object, or around this monitor. All right, that's cool, so those are a Viewport navigation, so it's all about the middle mouse button. Middle mouse, alone, by itself, is Pan or Truck or Pedestal. Alt and middle mouse is Orbit or Tumble. Control+Alt and middle mouse is Dolly or Zoom, and finally the Transforms of Position Rotation and Scale all have standardized keyboard shortcuts as well. So if I select an object, I can enter into the Move Tool, using the W key, and I've got the Move Tool active. I can switch to the Rotate Tool with the E key. And I've got the Rotate manipulator, Undo that. The R key is Scale, Undo that as well. Control+Z to undo. And the Q key on the keyboard is the Select Tool. Q for select. So Q, W, E, and R, are the most important keyboard shortcuts for the main toolbar. Q is Select, W is Move, E is Rotate, and R is Scale. And finally, if you want to Zoom in on an object, the keyboard shortcut for that is Z. Not Control+Z, that's Undo, and not Shift+Z, that's Undo Viewport Move, but just Z by itself. So if I select an object like that plant and press the Z key, then I'll zoom in on that object. If I have nothing selected, if I just click on a wall here, which is frozen, and I can't actually select that. So I click on nothing and press Z, then I'll zoom out to enclose the entire world. All right. Those are the most important keyboard shortcuts for Viewport Navigation and Object Manipulation.

Choosing 3ds max viewport shading modes

Choosing 3ds max viewport shading modes

Choosing 3ds max viewport shading modes If the viewport is in the default shading mode then you can choose some shading options from this menu here and it says standard by default. Click on that and we can switch over to, for example, performance mode, which as the name indicates, is for high-performance applications. In other words, if you've got a very heavy scene and you're having trouble navigating, switch over to performance mode and you'll lose your shading and lighting but you'll be able to navigate more quickly. From this menu we can also choose the high-quality mode and that'll take a moment to load actually and I found that the high-quality mode is actually not very reliable and in this case I can see that the exposure's all wrong so I don't actually use the high-quality mode. What I do is I use the standard mode and turn on lights and shadows, so let's do that. Now go back to standard mode and from that menu, lighting and shadows, I can choose to illuminate with scene lights and I've got all these photometric tube lights up in the ceiling and now I've got a nice lighting affect in our viewport and it is interactive. We can also enable shadows from this menu once again that now reads user defined, go in there to lighting and shadows, and enable shadows and we even have a screen-space ambient occlusion effect in here if we want that.

3ds max Navigating in viewports

3ds max Navigating in viewports

3ds max Navigating in viewports But in this axonometric projection, the lines of the grid still do not ever converge at a vanishing point. So objects maintain their size regardless of distance. So this is something I never use anymore, but if you get into this situation, then once again, you can use the undo. And I've done a bunch of these undos, so I might as well use the keyboard shortcut which is Shift + Z. I can do that a few times and get back to my front view. I can always choose the view from this pull-down list. I can choose Front view, but I might not be restored back to the same place that I was before. And finally, if you want to zoom in on particular objects, there is a button for that called Zoom Extents. And we've got them down here. There's Zoom Extents Selected, and then to right of it, Zoom Extents All Selected. So if we click Zoom Extents All Selected and nothing is selected, then all of the viewports are going to zoom out to enclose all of the geometry, all right. Let's select one object, so I'll grab this Select Object tool and select this plant and go back down here and click again Zoom Extents All Selected. And all of the views zoom to show that object. If we want to do it just in one view, we can select an object, like that monitor, and we have Zoom Extents Selected. Not Zoom Extents All Selected, but just Zoom Extents Selected. And only that one viewport zooms. All right, so if I want to go back to my perspective view that I had before, of course, I can use the undo and maybe do that again. And now I'm back to the framing that I had before. Those are the basics of using the viewport navigation controls in 3ds Max.

3ds max Transforming objects with Move and Rotate

3ds max Transforming objects with Move and Rotate

3ds max Transforming objects with Move and Rotate So, if I move everything in the top view, then I know I'm not moving them in Z or in elevation. And I can move the object in any one of the three cardinal directions in 3D space including Z which is the elevation. I'll undo that. Additionally I can move an object in two axes at once in the perspective view because there are three little brackets that correspond to the three planes of the Cartesian coordinate system. The x-y plane is the ground plane, you can move around just in the x-y space. Undo that. Then we have the y-z plane. Undo that. And then finally the z-x plane. Undo that. So, that's the move tool in a nutshell. Let's move onto the rotate tool and that's found next to it on the main toolbar. And we get a gizmo or a manipulator that looks like an orb. It has three interlocking circles and they are color coded to the axes, RGB, red, green and blue correspond to x, y and z, so if I rotate by clicking on the red axis, then I'm rotating around the x-axis of the world in this case. I'll undo that and then y is the green. And z is blue. I'll undo that as well. If you click in the center, then you've got a trackball kind of operation where you're swiveling and you're actually rotating in three dimensions. Undo that. And then finally we do have the ability to rotate in screen space with this outer circle here and I don't have much application for that in the perspective view. Undo that. But in the orthographic views, that outer ring can come in handy, so I can right click in the top view to give it focus and then just click on that outer ring